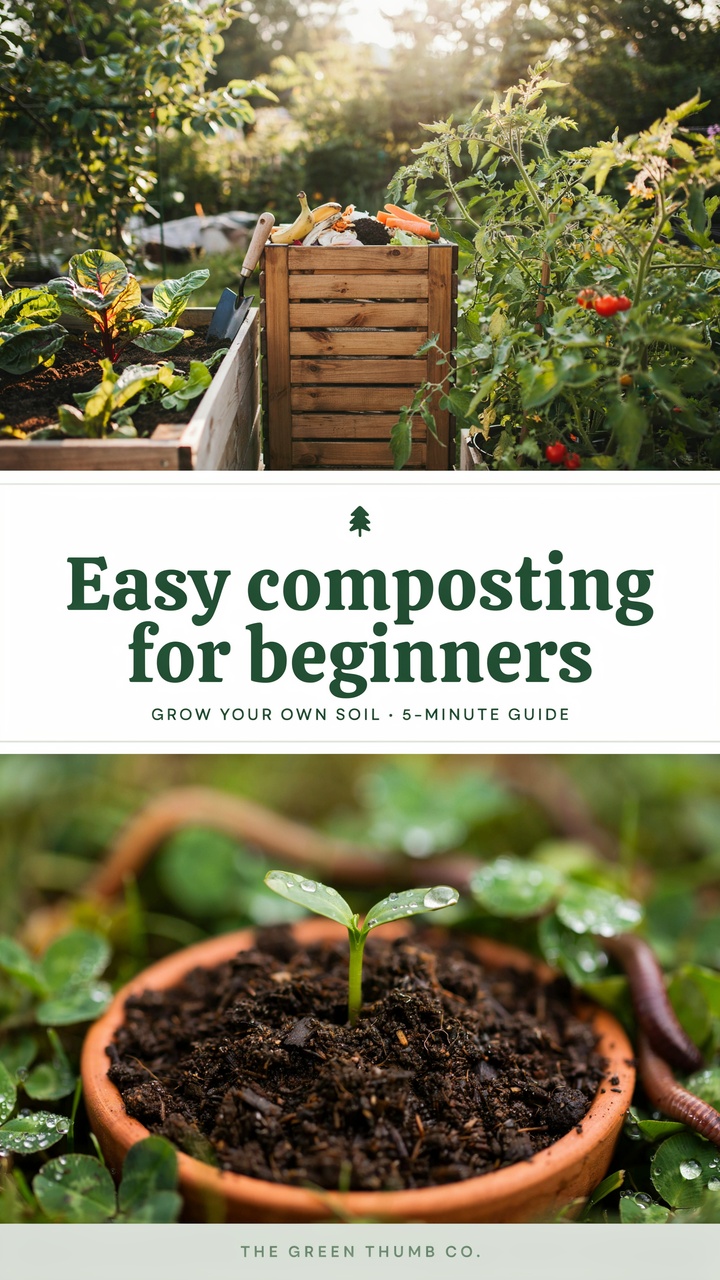
Imagine walking into your backyard and scooping up rich, dark soil that smells like fresh forest earth. That “black gold” you just created from yesterday’s banana peels and coffee grounds. Sounds almost magical, right?
For many beginners, composting feels intimidating—like you need a science degree or a big yard to make it work. I’ve been there. But here’s the truth: easy composting for beginners is simpler than most people think. You can start today with just a bucket or a small corner of your garden.
In this guide, I’ll walk you through everything step by step. No complicated setups. No fancy equipment. Just practical, proven methods that actually work for real people with busy lives.
Quick Answer: Easy Composting for Beginners
What is composting? It’s the natural process of turning food scraps, yard waste, and paper into nutrient-rich soil using microbes, worms, and time.
How long does it take? Most beginner methods produce usable compost in 2–6 months.
Can I do it in an apartment? Yes! Countertop bokashi or small worm bins work great indoors.
What’s the easiest method for beginners? A simple backyard pile or a basic compost bin using the “greens and browns” method.
Ready to dive deeper? Let’s get your hands (a little) dirty.
Why Easy Composting for Beginners Changes Everything
Composting isn’t just about reducing waste. It’s one of the most rewarding things you can do for your garden, your wallet, and the planet.
Every year, households throw away hundreds of pounds of food scraps. Those scraps end up in landfills producing methane—a greenhouse gas far more potent than carbon dioxide. When you compost at home, you cut that waste dramatically.
Your plants will thank you too. Compost improves soil structure, holds moisture better, and feeds beneficial microbes that help your vegetables, flowers, and herbs thrive. Many gardeners notice stronger plants and fewer pests after switching to homemade compost.
I started composting during the pandemic when I wanted to feel more self-sufficient. What began as a tiny experiment became one of my favorite daily habits. There’s something deeply satisfying about closing the loop—turning “trash” into treasure.
Understanding the Basics Before You Start
Composting is essentially controlled decomposition. Nature does this all the time on the forest floor. We’re just creating ideal conditions so it happens faster and without bad smells.
Two main types of materials make composting work:
- Greens (nitrogen-rich): Kitchen scraps, grass clippings, coffee grounds. These provide protein for the microbes.
- Browns (carbon-rich): Dry leaves, cardboard, paper, straw. These provide energy and help with aeration.
The secret is balance. Too many greens and your pile gets slimy and smelly. Too many browns and it decomposes very slowly.
Aim for roughly 2–3 parts browns to 1 part greens by volume. Don’t stress about perfect ratios—nature is forgiving.
Choosing Your First Composting Method
The best method depends on your space, time, and climate.
Backyard Compost Pile or Bin
This is the classic choice for beginners with outdoor space.
You can start with just a pile on the ground or buy/build a simple bin. Tumbling bins are convenient because they make turning easier, but a stationary bin or pile works fine too.
Worm Composting (Vermicomposting)
Perfect for apartments or small yards. Red wigglers eat your scraps and produce incredibly rich castings. It’s odor-free when done right and surprisingly fun.
Bokashi Composting
An anaerobic (no-oxygen) method using bran and a sealed bucket. Great for indoor use and it handles meat and dairy that traditional composting can’t.
For most beginners, I recommend starting with a simple backyard bin or pile. You can always add worm bins or bokashi later.
Getting Started: What You’ll Need
You don’t need much to begin easy composting for beginners.
Essential items:
- A compost bin or designated pile area
- Brown materials (leaves, shredded paper, cardboard)
- Green materials (kitchen scraps)
- A pitchfork or garden fork for turning
- Water source
Nice-to-have:
- Thermometer (to monitor heat)
- Gloves
- A small kitchen scrap collector
That’s it. Many people start with items they already have around the house.
Step-by-Step: Setting Up Your First Compost Pile
- Choose your spot. Pick a level area with good drainage that gets some sun but isn’t in full blazing heat all day. Close enough to the house for convenience but not right against your foundation.
- Build the base. Start with a layer of coarse browns like twigs or cardboard for airflow.
- Add your materials in layers. Alternate greens and browns. Chop or shred larger items to speed things up.
- Moisten as you go. The pile should feel like a wrung-out sponge—damp but not soggy.
- Top with browns. Always finish with a layer of browns to reduce flies and smells.
Your pile should be at least 3 feet tall and wide to generate enough heat, but don’t worry if it’s smaller at first. It will grow.
What to Compost (and What to Skip)
Great greens:
- Fruit and vegetable scraps
- Coffee grounds and filters
- Tea bags (remove staples)
- Fresh grass clippings
- Plant trimmings
Excellent browns:
- Dry leaves
- Shredded newspaper or office paper
- Cardboard (break it down)
- Straw or hay
- Egg cartons (paper ones)
Avoid or use sparingly:
- Meat, fish, and dairy (attracts animals)
- Oily foods or dressings
- Diseased plants
- Weeds that have gone to seed
- Pet waste (use a separate system)
- Treated wood or glossy paper
Daily Habits That Make Composting Easy
The key to success is consistency without obsession.
Keep a small container on your kitchen counter. I use an old ice cream tub with a lid. Empty it every day or two into your compost bin.
When adding scraps, cover them with a handful of browns. This simple habit prevents odors and pests almost completely.
Turn your pile every 1–2 weeks if using a stationary bin. Tumblers are even easier—just give them a spin.
Troubleshooting Common Beginner Problems
It smells bad. Usually too many greens or too wet. Add more browns and turn it well.
Nothing is happening. Pile too small, too dry, or too many browns. Add greens, water it, and turn it.
Flies or maggots. Normal in small numbers, but cover food scraps deeply with browns. Bury new additions in the center.
It’s too wet and slimy. Add dry browns generously and turn frequently.
Animals are digging. Use a bin with a secure lid or bottom. Avoid meat and dairy.
Don’t panic if things go wrong. Every experienced composter has killed a pile or two. It’s how you learn.
How to Know When Your Compost Is Ready
Finished compost is dark, crumbly, and smells earthy—like walking through the woods after rain. You shouldn’t recognize any original materials.
It might take 3 months in warm weather with regular turning, or 6–12 months if you’re more hands-off.
Test it by planting a few radish seeds in a pot of your compost. If they grow well, it’s ready.
Using Your Homemade Compost
Mix it into garden beds before planting. Use it as mulch around established plants. Make compost tea by steeping some in water for a liquid fertilizer.
Even a small amount makes a difference. I started with one bin and now have multiple systems because I love seeing the results in my garden.
Advanced Tips Once You’ve Mastered the Basics
Once you’re comfortable, try these:
- Hot composting for faster results (maintain 130–160°F)
- Lasagna layering in garden beds
- Leaf mold for beautiful mulch
- Worm composting for the richest amendment
Track what works in your climate. Composting looks different in Arizona versus Oregon.
Real Talk: My First Year Mistakes
I started too small and my pile dried out constantly. I also added way too many grass clippings at once and created a stinky mess.
Looking back, those mistakes taught me more than any guide. Now my systems run almost on autopilot.
Easy Composting for Beginners: Your Questions Answered
Can I compost in winter? Yes. Activity slows down but continues. Keep adding materials and insulate the pile if it gets very cold.
Does composting attract rats? Not if you avoid meat, dairy, and bread. Secure bins help too.
How much compost will I actually get? You’ll be surprised. A well-managed bin can produce 50–100+ pounds per year from one household.
Is it okay to add eggshells? Absolutely. Crush them first. They add calcium and help balance pH.
What if I live in an apartment with no yard? Bokashi buckets or worm bins under the sink work wonderfully. Many people even share community garden compost bins.
Can I compost citrus peels? Yes, in moderation. They break down slower but are fine.
Do I need to buy worms? For worm bins yes. For regular compost piles, they usually find their way in naturally.
Is store-bought compost better? Homemade is usually superior and free. Commercial compost is a good backup.
How do I prevent my compost from getting too hot or too cold? Monitor size and moisture. Turn more often in summer if it gets too hot.
Final Thoughts: Start Small, Stay Consistent
Easy composting for beginners isn’t about perfection. It’s about taking that first step and learning as you go.
In a few months, you’ll look at your thriving garden and that rich compost and feel proud. You’ll waste less, spend less on soil and fertilizer, and connect more deeply with the natural cycles around you.
So grab a bin, start collecting scraps, and begin your composting journey today. Your future garden (and the planet) will thank you.
Have you tried composting yet? Drop a comment below with your biggest question or first success story. I’d love to hear how it goes for you.
Happy composting!